
How to Prevent Contamination in a Cannabis Tissue Culture Lab: Clean-Room SOPs
Preventing contamination in a cannabis tissue culture lab comes down to disciplined sterile technique, clean-room airflow that runs from clean to dirty, and daily SOPs your whole team follows the same way every time.
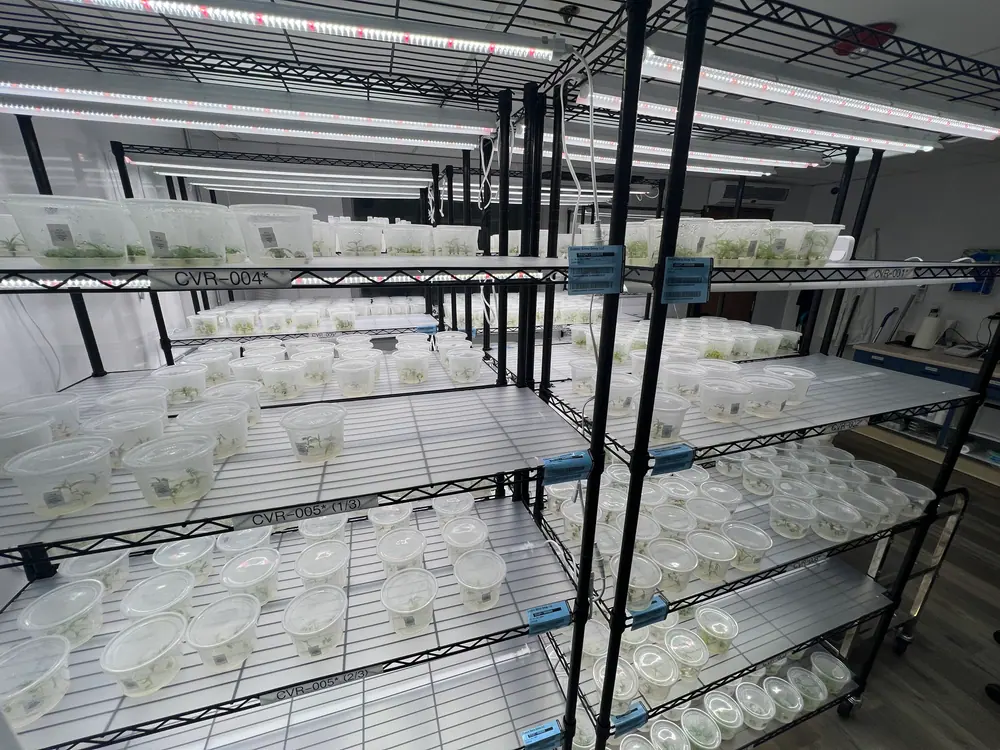
Contamination is the single biggest threat to a working cannabis tissue culture lab, and almost all of it is preventable with disciplined sterile technique, clean airflow, and daily SOPs your team actually follows. Losing cultures to mold, bacteria, or yeast is not bad luck. It is a signal that something in your process broke down. The good news: contamination follows patterns, and once you understand those patterns you can design them out.
This is the operator’s playbook. No theory for its own sake. What causes contamination, how to stop it, and how to build habits that hold up when your team is busy and tired.
What causes contamination in a cannabis tissue culture lab?
Contamination comes from three sources: the plant material you bring in, the environment around your cultures, and the people handling them. Most of it is human.
Fungal spores, bacteria, and yeast are everywhere. They ride in on unclean explants, drift in through poorly filtered air, live on unsterilized tools, and hitch onto sleeves, hands, and hair. Endophytic bacteria hiding inside the plant tissue are the sneakiest, because they show up days later after everything looked clean. When you trace a contamination event back to its root, you almost always land on a broken step: a rushed sterilization, a hood used wrong, a lid opened outside the sterile field. Pathogens like HLVd are a different problem than airborne contamination, and they need meristem culture and clean-stock work rather than clean-room technique alone.
What is sterile technique and why does it matter?
Sterile technique is the set of practiced movements and habits that keep living contaminants out of your cultures during every transfer. It matters because a single lapse can cost you a whole batch.
In tissue culture you are working with sterile media that is a perfect food source. Anything that lands on it will grow, fast. Sterile technique is how you keep the invisible stuff off the media and off the plant. It is flaming your tools, working inside the clean zone of a laminar flow hood, never passing your hands over open vessels, and moving with intention instead of speed. Techs who treat it as a discipline, not a chore, are the ones whose plates stay clean. This is a learnable skill, and it is the core of the hands-on training we build into every lab.
How should you set up clean-room airflow and zones to stay clean?
A clean lab is organized from dirty to clean, with filtered air always flowing from your cleanest space outward. Contamination travels on air and on traffic, so you control both.
Your transfer room is the heart of it. It should hold positive pressure so unfiltered air cannot sneak in when a door opens, run HEPA-filtered air, and stay low-traffic. Media prep, washing, and sterilization belong in separate zones with their own airflow, kept away from the transfer space. People and plant material should move in one direction, from the messier zones into progressively cleaner ones, then out. We cover the full zone-by-zone build in our post on tissue culture lab design and clean-room essentials. Get the physical layout right and your daily SOPs get much easier to follow.
What are the core daily SOPs that keep cultures clean?
The core daily SOPs are a consistent gowning routine, a disciplined hood setup, clean transfer movements, and end-of-day decontamination. Same steps, every day, every tech.
A reliable daily flow looks like this:
- Gown at the clean-room entrance. Clean lab coat or gown, gloves, hair covered. No street clothes past this line.
- Wipe down and set up the hood before any work. Let the laminar flow run before you start, and stage only what you need inside the clean zone.
- Sanitize gloved hands often, and re-sanitize any time you touch something outside the sterile field.
- Work clean. Keep vessels toward the back of the hood, open lids for the shortest time possible, and never reach over an open culture.
- Flame and cool tools between every explant so you are not carrying contaminants from one plant to the next.
- Wipe down and decontaminate the hood and surfaces at the end of the session, and reset for the next day.
The power is in the repetition. When the sequence is the same every time, a skipped step becomes obvious.
How do you sterilize tools, surfaces, and media correctly?
You sterilize by matching the method to the target: autoclave for media, glassware, and heat-safe tools; flame for scalpels and forceps between cuts; and the right disinfectant for hands and surfaces. Each has a job, and none of them covers for the others.
Autoclave your media and vessels fully, and confirm the cycle actually reached temperature instead of assuming it did. During transfers, sterilize tools between every explant, and let them cool so you are not cooking the tissue. Wipe hood surfaces and gloves with an appropriate disinfectant, and give it real contact time. A quick smear does nothing. The failure mode almost always looks the same: a step got shortened. Full cycle, real contact time, tools cooled and clean. Do not let a busy day compress the parts that protect you.
How do you spot and isolate contamination before it spreads?
You catch contamination by inspecting cultures on a regular schedule and pulling anything suspect the moment you see it. Speed of isolation is what keeps one bad vessel from becoming ten.
Train your eyes for the early signs: cloudy or discolored media, fuzzy growth, a slick or shiny film, or an off smell. When you find it, do not open the vessel to investigate inside the clean room. Remove it, isolate it away from healthy cultures, log it, and dispose of it properly. Then ask what happened. Contamination clustered on one tech’s plates, one shelf, or one media batch tells you exactly where to look. Tracking those patterns over time is where a system like our lab platform earns its keep, turning scattered losses into a clear signal you can act on.
What habits separate a clean lab from a struggling one?
The habits are consistency, honesty, and slowing down. A clean lab does the same clean steps every single time and tells the truth when something goes wrong.
Here is the difference in practice:
- Struggling lab: rushes transfers, skips steps under pressure, hides or ignores contamination, blames luck.
- Clean lab: works at a steady pace, follows the SOP even when busy, logs every contamination event, and treats each one as a lesson.
The clean lab is not more talented. It is more disciplined. Contamination rates fall when the team stops treating clean technique as optional on hard days.
How do you build contamination-proof SOPs into your team’s routine?
You build them in by writing the SOPs down, training against them, and holding everyone to the same standard until it becomes muscle memory. Culture beats posters on the wall.
Start with clear, written procedures for gowning, transfers, sterilization, and inspection. Train new techs hands-on and check their technique, do not assume they picked it up. Make logging contamination normal and blame-free so people report instead of hide. Then review the data together and tighten the weak spots. This is the model we bring to every operator we work with: real ownership of a clean process, so the lab runs on discipline you own rather than dependence on us.
Clean stays clean when the whole team believes in it. If you want help building a lab and a team that runs this way from day one, let’s talk about your operation.