
What Equipment Do You Need to Start a Cannabis Tissue Culture Lab?
A cannabis tissue culture lab runs on a small, specific set of equipment: a laminar flow hood, an autoclave or reliable sterilization method, a controlled growth space, and clean containers, tools, and media.
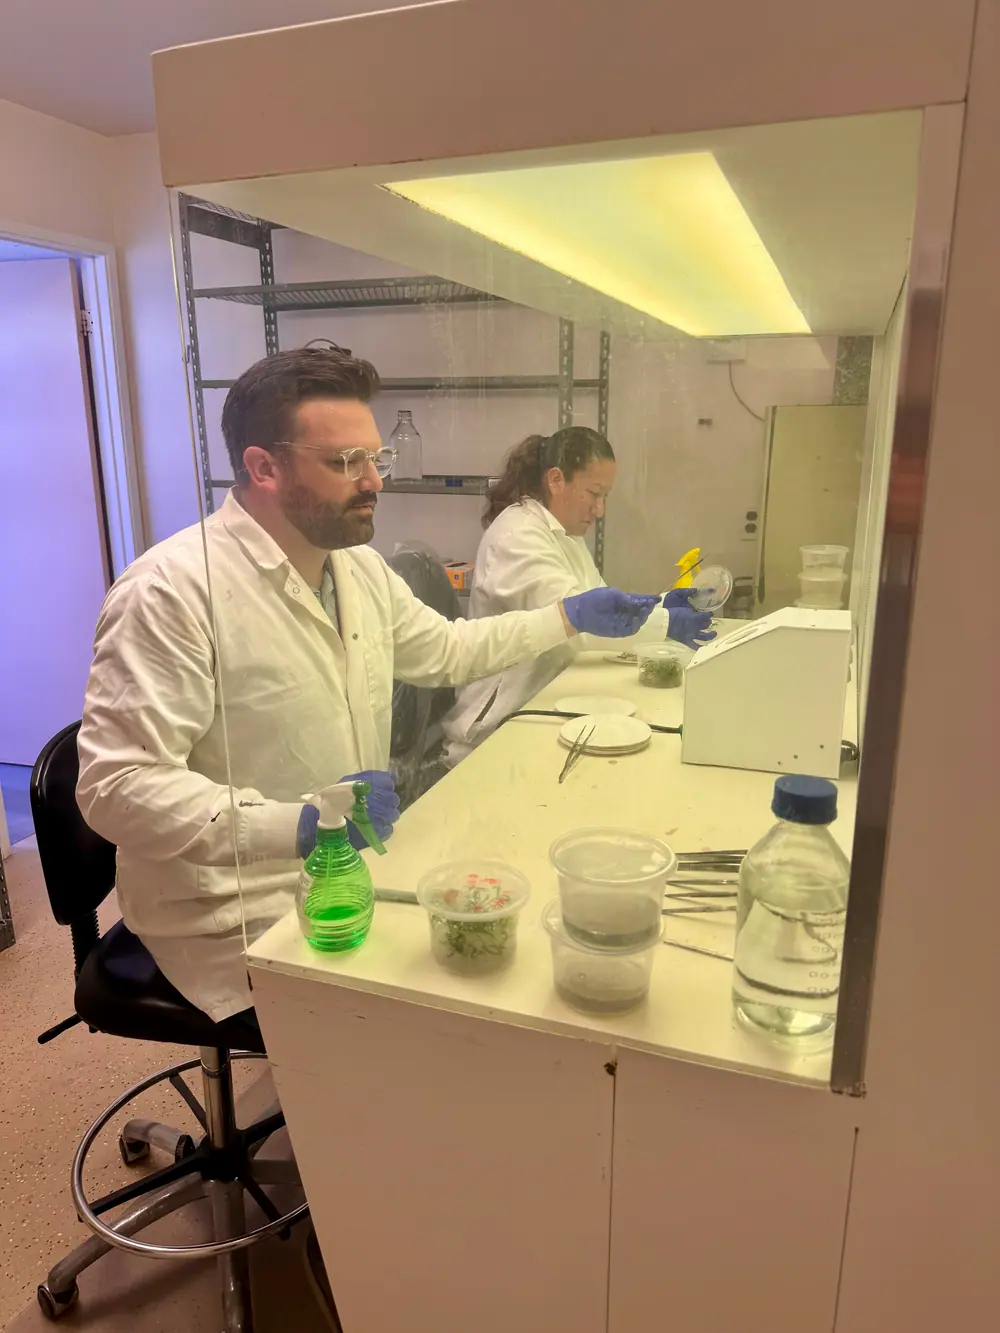
A cannabis tissue culture lab runs on a small, specific set of equipment: a laminar flow hood, an autoclave or reliable sterilization method, a controlled growth space, and clean containers, tools, and media. Everything else is refinement. Below is the core list, why each piece matters, and where operators waste money before they need to.
I have spent years building these labs across the country. The pattern is always the same. People overbuy on things that look impressive and underbuy on the two or three items that actually protect their genetics. Let me walk you through what you truly need, in the order it matters.
What equipment do you need to start a cannabis tissue culture lab?
You need a laminar flow hood, a sterilization method, a controlled growth area, and clean consumables. Those four categories cover a working starter lab. A cannabis tissue culture lab is a set of clean zones and tools that move plant tissue through sterile transfer and controlled growth with minimal contamination.
Here is the short list, grouped by job:
- Sterile transfer: laminar flow hood, scalpel and forceps, a sterilizing method for tools (bead sterilizer or flame source), 70 percent alcohol
- Sterilization: autoclave or pressure cooker, distilled or reverse-osmosis water
- Growth and holding: a climate-controlled culture room or shelf with photoperiod lighting, stable temperature, and clean air
- Media and consumables: growth media, culture vessels, closures, gloves, labels
- Support: a scale for weighing media, a pH meter, and basic prep glassware
Get those working together and you can initiate, multiply, and hold clean material. The rest is scale.
Why is the laminar flow hood the core of the lab?
The laminar flow hood is the single most important piece of equipment in a tissue culture lab because it gives you the sterile air where every transfer happens. Everything you do that matters, cutting tissue, moving explants, subculturing, happens inside that clean airflow.
A hood pushes HEPA-filtered air across your work surface in a smooth, one-direction sheet, so airborne mold and bacteria get swept away from your open vessels instead of settling into them. Without it, you are working in room air, and room air is full of contamination you cannot see until it blooms three days later in your jars.
If you spend real money on one thing, spend it here. Buy a hood sized for the number of people who will work at once, and place it away from doors, foot traffic, and HVAC drafts. A good hood in a bad spot still fails. We cover placement and the clean zones around it in our lab design and clean room guide.
How do you sterilize tools, media, and containers?
You sterilize with heat: an autoclave or pressure cooker for media and containers, and a bead sterilizer or flame for your tools between cuts. Sterilization is the discipline that keeps a lab alive, and it is where most beginners cut corners.
A simple, reliable sterilization loop looks like this:
- Wash containers and glassware, then autoclave them so they start clean.
- Prepare media, pour it into vessels, and autoclave the filled vessels to set the media sterile.
- At the hood, sterilize your scalpel and forceps between every explant using a bead sterilizer or flame.
- Wipe the work surface and your gloves with 70 percent alcohol before and during work.
A benchtop autoclave is the professional choice because it holds pressure and temperature reliably. A quality pressure cooker can carry a small starter lab in the beginning, and plenty of good labs started exactly there. What you cannot skip is a real heat step. Alcohol and bleach alone will not sterilize media or vessels.
What do you need to grow and hold cultures?
To grow and hold cultures you need a climate-controlled space with steady temperature, clean air, and consistent photoperiod lighting. Once tissue leaves the hood, it lives on a shelf for weeks. That shelf has to hold conditions without swinging.
Your culture space needs three things: stable temperature in the low-to-mid twenties Celsius range, low-energy lighting on a fixed photoperiod timer, and air that is not blowing contamination across your vessels. A dedicated grow tent with a timer, LED shelf lighting, and a small climate control setup is enough to start. As you grow, this becomes a proper culture room with racking.
The mistake here is treating the growth room as an afterthought. Contamination that slips past the hood shows up on these shelves, and temperature swings stall multiplication and stress your material. Clean, boring, and consistent wins. That same clean stock is what feeds cold storage and Gen-0 replacement, which is the point of the whole exercise. You can see how that fits the bigger operation on our services page.
What media, containers, and consumables should you stock?
Stock growth media, culture vessels with vented closures, gloves, and labels, plus the prep items to make and adjust media. These are the running costs of a lab, the things you reorder, not the things you buy once.
A practical starter stock list:
- Media: a base tissue culture medium plus the plant growth regulators your protocol calls for
- Vessels: clear culture containers or jars with breathable closures
- Water: distilled or reverse-osmosis, never straight tap
- Prep: a scale sensitive enough to weigh media components, a pH meter, and mixing glassware
- Handling: nitrile gloves, 70 percent alcohol, and durable labels for tracking every vessel
Label discipline matters more than it looks. Once you are running many cultivars through multiple stages, you cannot rely on memory. Tracking each vessel through its stages is exactly the kind of work our lab platform is built to handle so nothing gets lost.
What equipment can you skip when you are starting out?
When you are starting out you can skip most automation, redundant equipment, and anything sized for volume you do not have yet. New operators love to buy for the lab they imagine instead of the lab they are running.
You do not need multiple hoods on day one. You do not need a large autoclave when a small one or a pressure cooker covers your batch size. You do not need automated media dispensing, custom casework, or a second growth room before your first one is full. Skip the impressive-looking extras and put that money into the hood, the sterilization step, and clean consistent growth conditions.
Here is the simple comparison I give operators:
- Buy first: laminar flow hood, sterilization method, controlled growth space, clean consumables
- Buy later: second hood, larger autoclave, automated dispensing, dedicated media room, backup systems
How does your equipment list change as you scale?
As you scale, you add capacity and redundancy, not new categories. The equipment types stay the same. You simply need more transfer stations, more sterilization throughput, and more controlled growth space, plus backups so one failure does not stop production.
Scaling usually looks like a second and third hood so more people transfer at once, a larger or second autoclave to keep up with vessel volume, and a real culture room with racking instead of a shelf. You start thinking about redundancy: a backup on critical systems so a single equipment failure does not cost you a run of irreplaceable genetics. The core list does not change. The quantities and the margin for error do.
How do you avoid buying the wrong equipment for your operation?
You avoid buying the wrong equipment by sizing the lab to your real production target and your genetics, not to a generic list online. The right hood, the right sterilization capacity, and the right growth footprint depend entirely on how many cultivars you run and how much clean material you need each month.
This is where a generic equipment list burns people. A hood that fits one operation is wrong for another. Sterilization sized for a small program bottlenecks a larger one. Before you spend, map your cultivar count, your monthly clean-stock target, and your space, then buy to that.
I built a full client lab in about six months, live and running, by sizing every piece to what that operation actually needed. That is the difference between equipment that works and equipment that sits in a corner.
If you want a right-sized equipment list built for your operation instead of a generic one, let’s talk through your space and your goals.